The Sage 300 ERP Web Deployment Wizard and Integration with Sage CRM
Demystifying The Sage 300 ERP (Accpac) Web Deployment Wizard To Enable Integration With Sage CRM
As I hope I’ve made clear in previous articles, in order to ensure a smooth integration between Sage 300 ERP and Sage CRM the foundation must be a correctly deployed and configured Web Deployment of Sage 300 ERP.
Because the Web Deployment Manager/Wizard looks and feels very different than the main Sage 300 user interface, uses a lot of terminology unrelated to the desktop version of Sage 300 and configures differently than the desktop version, users get confused working through the Wizard. Therefore, I’m going to provide a screen by screen walk-through explaining the Web Deployment Wizard, launched by the Web Deployment Manager and high-light important things to know.
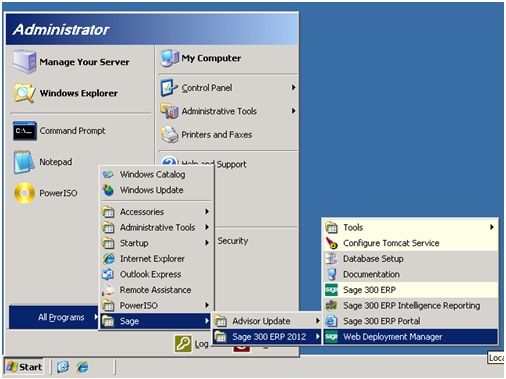
On your web server, start by running the Web Deployment Manager application from the Start Menu. The path should like something like this:
You can also run the “a4wesconfig.exe” executable from the Runtime folder in your Sage 300 programs directory.
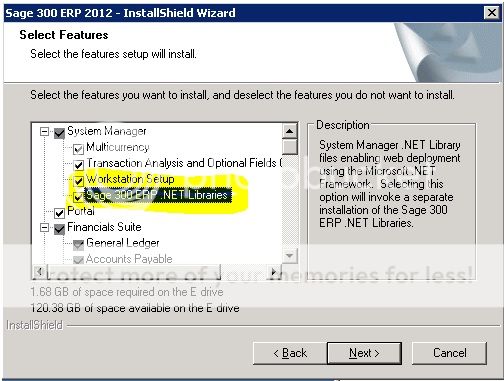
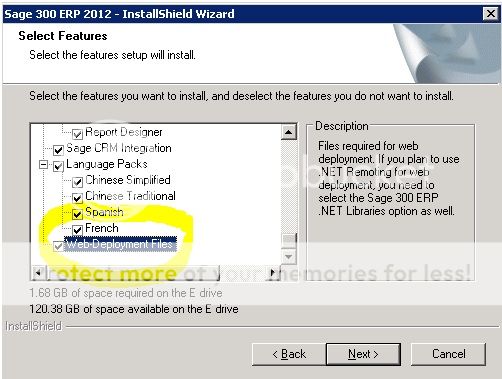
If you are missing the Web Deployment Manager, then you need to re-run the installer making sure that you check the “Web-Deployment Files” box as well as Sage 300 ERP .NET Libraries.
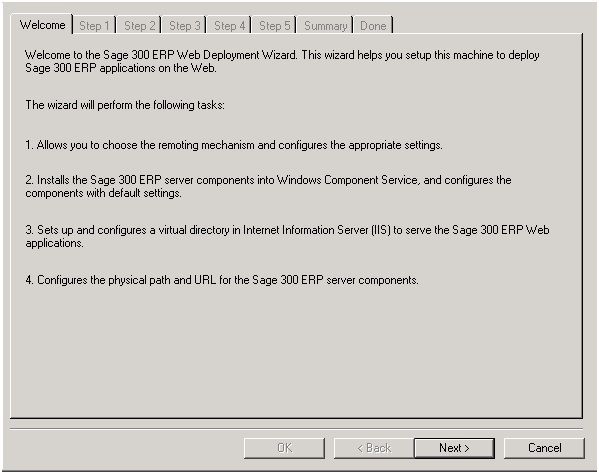
Running the program starts the Web Deployment Wizard and you are presented with the Welcome tab which provides a simple overview of the configuration steps:
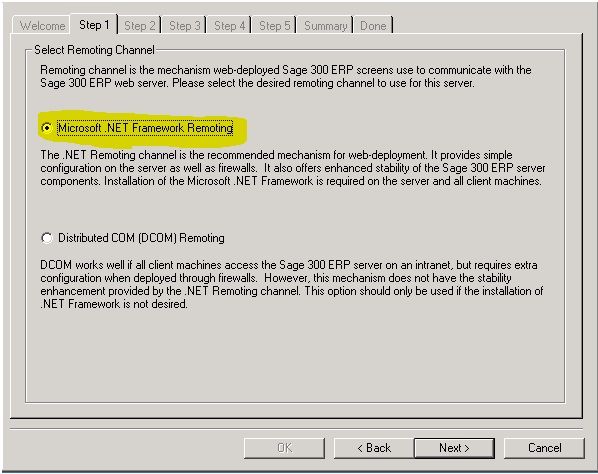
Clicking Next brings up Step 1 to choose the Remoting Channel:
As the rhetoric at the top explains, choosing a Remoting Channel is required as it dictates how Sage 300 communicates with the web server on which it’s being installed.
What does this mean?
Web Deployment is a method of running the application; it is an alternative to running it via the desktop through Windows as it’s generally done. Web Deployment provides a web-based foundation to work in Sage 300. Think of it as website running your Sage 300 program.
Which Remoting Channel should you choose? I’ll keep it simple: Microsoft .NET Framework Remoting. Sage is moving away from doing anything with DCOM – in fact, the readme bundled with the installer clearly states: “Version 2012 does not support the DCOM remoting channel for Web Deployment” – so don’t bother considering this option.
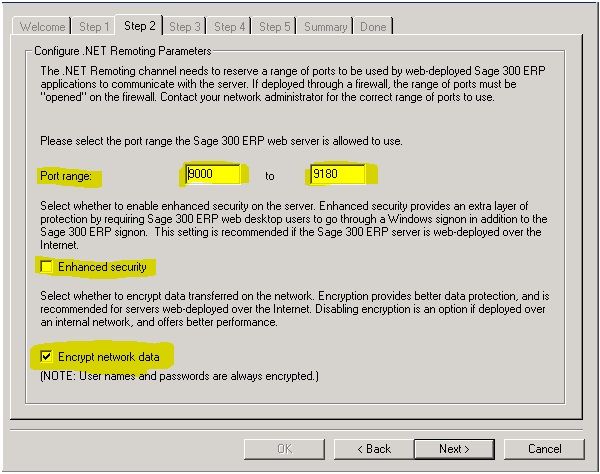
Clicking Next brings up Step 2 to choose the .NET Remoting Parameters (since we chose .NET Remoting in Step 1), specifically those related to server communications and security:
The Port Range is required to specify the exact “paths” Sage 300 Web is allowed to use to do the communication I mentioned above. More specifically, when you are working in Web Deployed Sage 300, the information flowing back and forth from your web browser and the server will go through these paths. You do not have to use this exact range of 9000-9180 but you should choose a range of 180 ports for reasons that will be clearer in the next step. Talk with your IT resource to confirm this range is acceptable to use in your environment and also about ensuring these ports are open in your Windows Firewall. There is a “hot-fix” utility offered from Sage to open certain ports on local Windows Firewall for Sage 300 (Accpac) Web Deployment.
Enhanced Security checkbox – Checking this option requires users to both login with their Sage 300 usernames and passwords and enter a Windows username and password. As the step suggests, check this option if users will be accessing Sage 300 over the internet – that is, outside your building.
Encrypt network data checkbox – A second option for protecting your data, choosing this option is intended to provide extra security. As per the Enhanced security, this setting is especially recommended if Sage 300 will be accessed over the internet – again, outside your building. The language suggests that not setting this option could improve performance, but remember: software and hardware performance are impacted by many factors and web applications are no different.
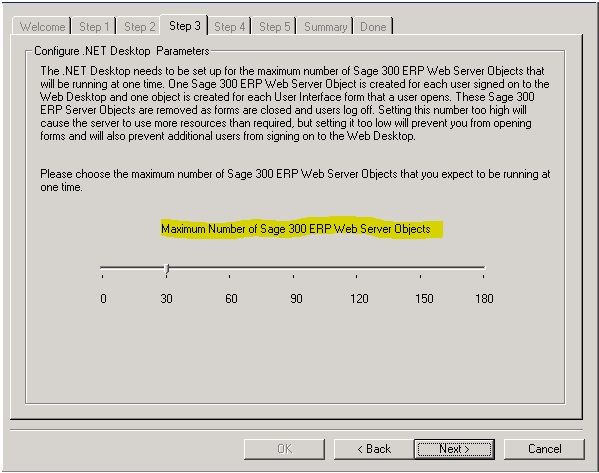
Clicking Next brings up Step 3 to choose additional .NET Remoting Parameters related to the maximum number Web Server Objects allowable:
What the heck are these objects?
When you are working in desktop Sage 300, clicking on icons pops-up work areas such as AR Receipt Batch List, IC Day End Processing or the GL Trial Balance report. When using Web Deployment, each one of those screens that pop-up do so via a Web Server Object. So that means, if maxed out to 180 for example, six Sage 300 users could have 30 screens “popped-up” at one time – or 60 users could have three – and so on. Exactly how many objects you’ll need to configure for will vary among environments – it really depends on the number of CRM users who will need to launch Sage 300 screens from Sage CRM and how many they require to be open at once. Also, it’s worth addressing the on-screen language about.
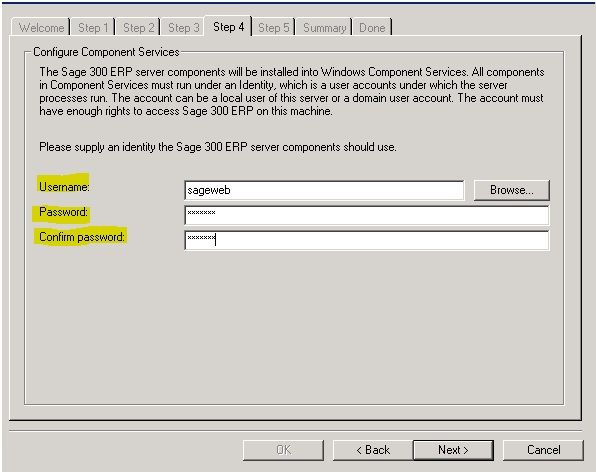
Clicking Next brings up Step 4 to Configure Component Services:
“Configure Component Services” is fancy-talk for entering a Windows user account and its password for a properly configured account that will run the Web Deployment service in the background. This is known in Windows parlance as granting “Log On As a Service” right to a user; it is a common practice. If you need additional information on this concept, simply Google that phrase. A couple critical items regarding the user you designate here:
- Make sure the set up of the Windows user itself is properly configured ahead of time – see my article on this topic: A Simple Way To Configure A Windows User To Run Sage 300 ERP (Accpac) Web Deployment And Sage CRM Integration
- Whenever possible use a domain user account especially when the webserver and data server are different machines. Make sure to use the standard <DOMAIN><WINDOWS ACCOUNT> convention when keying the user in.
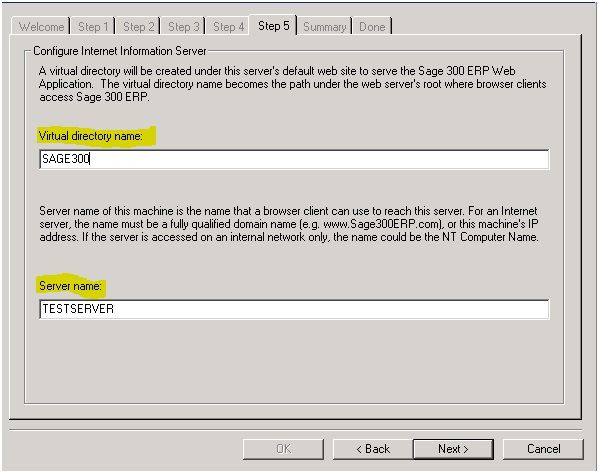
Clicking Next brings up Step 5 to Configure Internet Information Services (IIS):
Before specifying a Virtual Directory Name, you might care to know exactly what a Virtual Directory is. It’s the path in IIS which maps to the location of the actual program files needed for Sage 300 to run as a web application. The wizard will default “Sage300ERPDesktop” into is field – I suggest shortening it to SAGE300 for fewer keystrokes. The virtual directory name becomes part of Web Deployed Sage 300’s application’s URL and uses it to bring program functionality from the web server to the user’s web browser.
The onscreen explanation of the Server Name is pretty good. Here’s the short re-summary: If Sage 300 is going to be accessed over the internet, then a Fully Qualified Domain Name (FQDN) that you own (e.g. www.yourcompany.com), must be entered here. Or the unique, corresponding IP address (e.g. 123.456.7.89) for your FQDN can be entered. If Sage 300 will only be accessed inside your network, then the machine name (e.g. TESTSERVER) should be fine.
What’s the net result of these two fields? Based on the example above, inside your network users could navigate to http://TESTSERVER/SAEGE300 to launch.
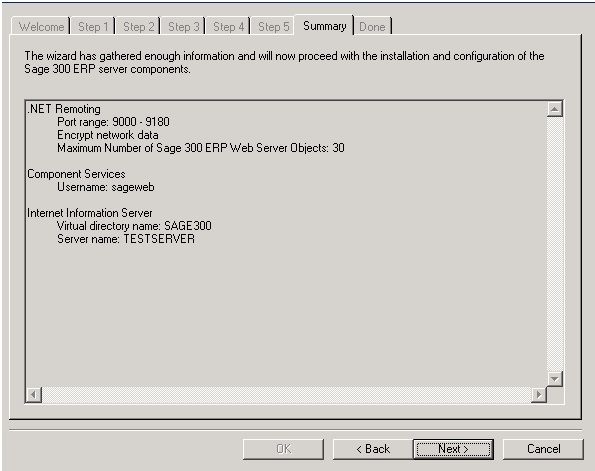
Clicking Next brings up the Summary tab:
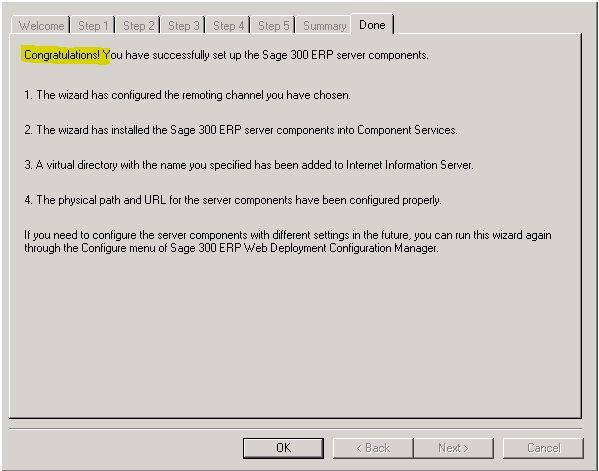
A high-level summary of the configuration is presented. Clicking Next brings up the Done tab:
One word: Congratulations.
Featured image provided by: http://www.flickr.com/photos/ramseynasser/6244656960/

